This is a super easy skirt to make. It can be done with as little as 1 1/2 yards of fabric - more if you want it longer.
Materials:
1 1/2 to 2 yards of fabric
1" elastic for waistband, same length as your wasitline, plus a 1/2" or so for seam allowance
Matching thread
*All seams are 1/2"
The skirt has two sections: the drop-waist (the top) and the skirt (the bottom).
To determine fabric for the drop-waist:
1.) For the length, measure from you waist to your hip crease. Your hip crease is the place where your femur (thigh bone) meets your hip joint - the part that bends when you sit.
For example: I measured 8" then added 2" for a total of 10" for the length of my drop-waist.
2.) For the width, measure your hips and add 5", plus another inch for seam allowance.
For example: The width for me was 42" plus 1" for seam allowance for a total of 43".
I was lucky enough that my fabric was wide enough from selvage to selvage, so I used the width of the fabric to cut one piece, 10" by 43".
You can divide this in two pieces, just be sure to add enough seam allowance.
To determine the length of the skirt:
3.) Decide how long you want the skirt and add 2" for seam allowance.
4.) For the width, take the width of the drop-waist and add 20" to that, plus 1" for seam allowance.
The width for my skirt was 62", plus 1" for a total of 63".
Put it all together:
5.) For the drop-waist, place the RIGHT sides of the fabric together matching the raw edges, and stitch the seam.
6.) To create the wasitband, fold the top edge of the drop-waist over 1 1/2 ".
Open that up, and fold over 1/4" to create a clean, finished edge.
Press seam back down and stitch closed, creating the casing for the elastic. Next, topstitch along the top edge of the wasitband. I think this adds a cleaner look and helps keep the elastic in the waistband from twisting.
The drop-waist section should look something like the picture below. To help line up the side seams of the skirt with the drop waist, center the fabric of the drop-waist and iron the sides to create creases. You will use this when joining the drop-waist to the skirt.
Now for the skirt:
7.) With the RIGHT sides together, line up the raw edges and stitch seam. Trim the seams with pinking shears to keep the edges from raveling. Then press open.
8.) Create the gathers on the skirt. If you don't know how to make gathers, here is a great tutorial: Gathers.
9.) Pin skirt to raw edge of the drop-waist with RIGHT sides together. Match seams of skirt to creases you ironed into the drop-wasit section, adjusting gathers so they are even. Stitch pieces together.
10.) Zig-Zag stitch along the gathered seam to keep fabric edges from raveling.
11.) Press allowance seam up and topstitch close to the edge of the seam where the drop-waist meets the gathered skirt.
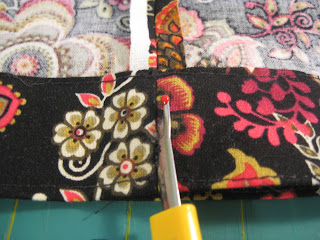
12.) Add elastic to the waistband. First, open the seam in the waistband and, then pull the elastic through using a safety pin.
14.) Hem the skirt you favorite way and you're done!!
Sew Simple!!!


No comments:
Post a Comment