Saturday, September 1, 2012
Monday, February 27, 2012
"FOR PLEAT'S SAKE" PLEATED TOTE
I found this pattern months ago while surfing the internet and fell in love with it. It's been on my Pinterest "to-do" list for quite some time. I FINALLY got around to making it!
You can find the free PDF pattern here: Pleated Tote

Here is my version:


I made my own handles out of fabric rather than buy pre-made ones, since I couldn't find anything I liked in the stores. I embellished the straps with little matching fabric flowers and buttons. You can't see it, but I lined the tote with black fabric to match the handles. I also added a snap closure because I like my bags to close at the top.
Once again, I bought the fabric at JoAnn's.
I was an easy pattern to follow and creates a good-sized tote. I had some extra fabric, so I made a small bag and key fob to go along with it.

You can find the free PDF pattern here: Pleated Tote

Here is my version:


Once again, I bought the fabric at JoAnn's.
I was an easy pattern to follow and creates a good-sized tote. I had some extra fabric, so I made a small bag and key fob to go along with it.

Happy Sewing!!
Saturday, February 25, 2012
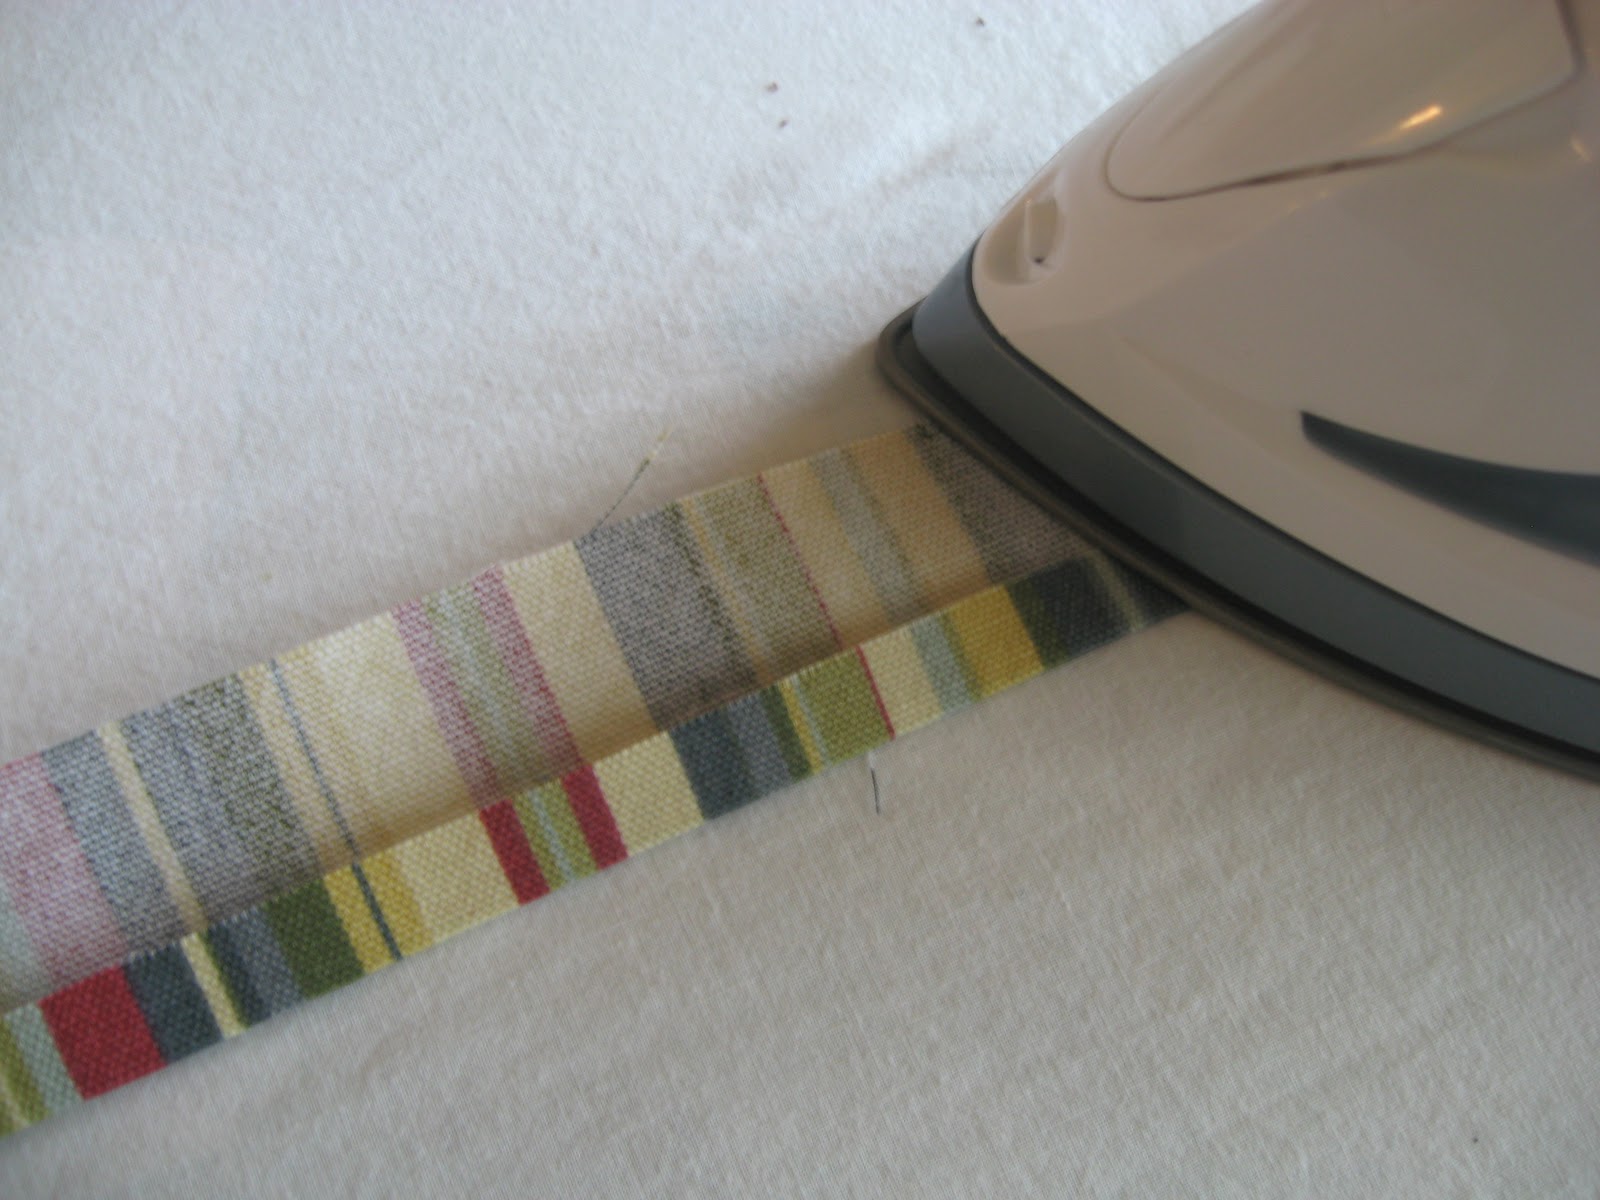
FUSE AND GATHER TAPE
As I was perusing the internet and Pinterest, I came across a new product - new to me, anyway. It's called Fuse and Gather Tape.
This tape lets you press, pull, stitch, and you have gathers. All you do is press the Fuse 'n Gather on the wrong side of the fabric, tie threads at one end, pull the blue threads at the opposite end to gather to length needed. Perfect for creating easy gathers and ruffles for all types of crafts.


You can get a 5/8" 15-yd. package for $12.24 at Create for Less.com - just click on the CreateForLess link to the right under Sponsors.
I am definitely going to try this out. It looks like a great time-saver and Sew Simple!
Wednesday, February 22, 2012
SEWING AN INVISIBLE ZIPPER
I am in the process of making a pleated skirt that will need a zipper. I like using invisible zippers, but I haven't put one in since I made matching Star Trek costumes (pictured below) for my daughter and me about 18 years ago. I can't believe it's been that long!


It was a great refresher for me. I had forgotten how easy they are to sew. Now I just need to go purchase the invisible zipper foot that didn't come with my new sewing machine! (Which I absolutely love, btw.)
Tuesday, February 21, 2012
PELLON FABRIC STABILIZER GIVEAWAY
Check it out: Sew Can Do is sponsoring another give- away.
You can win nearly 50 yards of stabilizer from Pellon and that's a total value of over $90!

Just click here: Sew Can Do
Good Luck!!
You can win nearly 50 yards of stabilizer from Pellon and that's a total value of over $90!

Just click here: Sew Can Do
Good Luck!!
Monday, February 20, 2012
TIERED SKIRT


I purchased the fabric for this skirt at JoAnn's, my go-to place since it's the only fabric store in my area. I also go there because I get a teacher's discount. JoAnn's gives a 15% discount off your total purchase, sale and regular priced items. You just have to sign up for the card. You need to show proof you are a teacher; they require a school ID.
Happy Sewing!!
Sunday, February 19, 2012
EASY DROP-WAIST SKIRT


This is a super easy skirt to make. It can be done with as little as 1 1/2 yards of fabric - more if you want it longer.
Materials:
1 1/2 to 2 yards of fabric
1" elastic for waistband, same length as your wasitline, plus a 1/2" or so for seam allowance
Matching thread
*All seams are 1/2"
The skirt has two sections: the drop-waist (the top) and the skirt (the bottom).
To determine fabric for the drop-waist:
1.) For the length, measure from you waist to your hip crease. Your hip crease is the place where your femur (thigh bone) meets your hip joint - the part that bends when you sit.
For example: I measured 8" then added 2" for a total of 10" for the length of my drop-waist.
2.) For the width, measure your hips and add 5", plus another inch for seam allowance.
For example: The width for me was 42" plus 1" for seam allowance for a total of 43".
I was lucky enough that my fabric was wide enough from selvage to selvage, so I used the width of the fabric to cut one piece, 10" by 43".
You can divide this in two pieces, just be sure to add enough seam allowance.
To determine the length of the skirt:
3.) Decide how long you want the skirt and add 2" for seam allowance.
4.) For the width, take the width of the drop-waist and add 20" to that, plus 1" for seam allowance.
The width for my skirt was 62", plus 1" for a total of 63".
Put it all together:
5.) For the drop-waist, place the RIGHT sides of the fabric together matching the raw edges, and stitch the seam.
6.) To create the wasitband, fold the top edge of the drop-waist over 1 1/2 ".

Open that up, and fold over 1/4" to create a clean, finished edge.

Press seam back down and stitch closed, creating the casing for the elastic. Next, topstitch along the top edge of the wasitband. I think this adds a cleaner look and helps keep the elastic in the waistband from twisting.

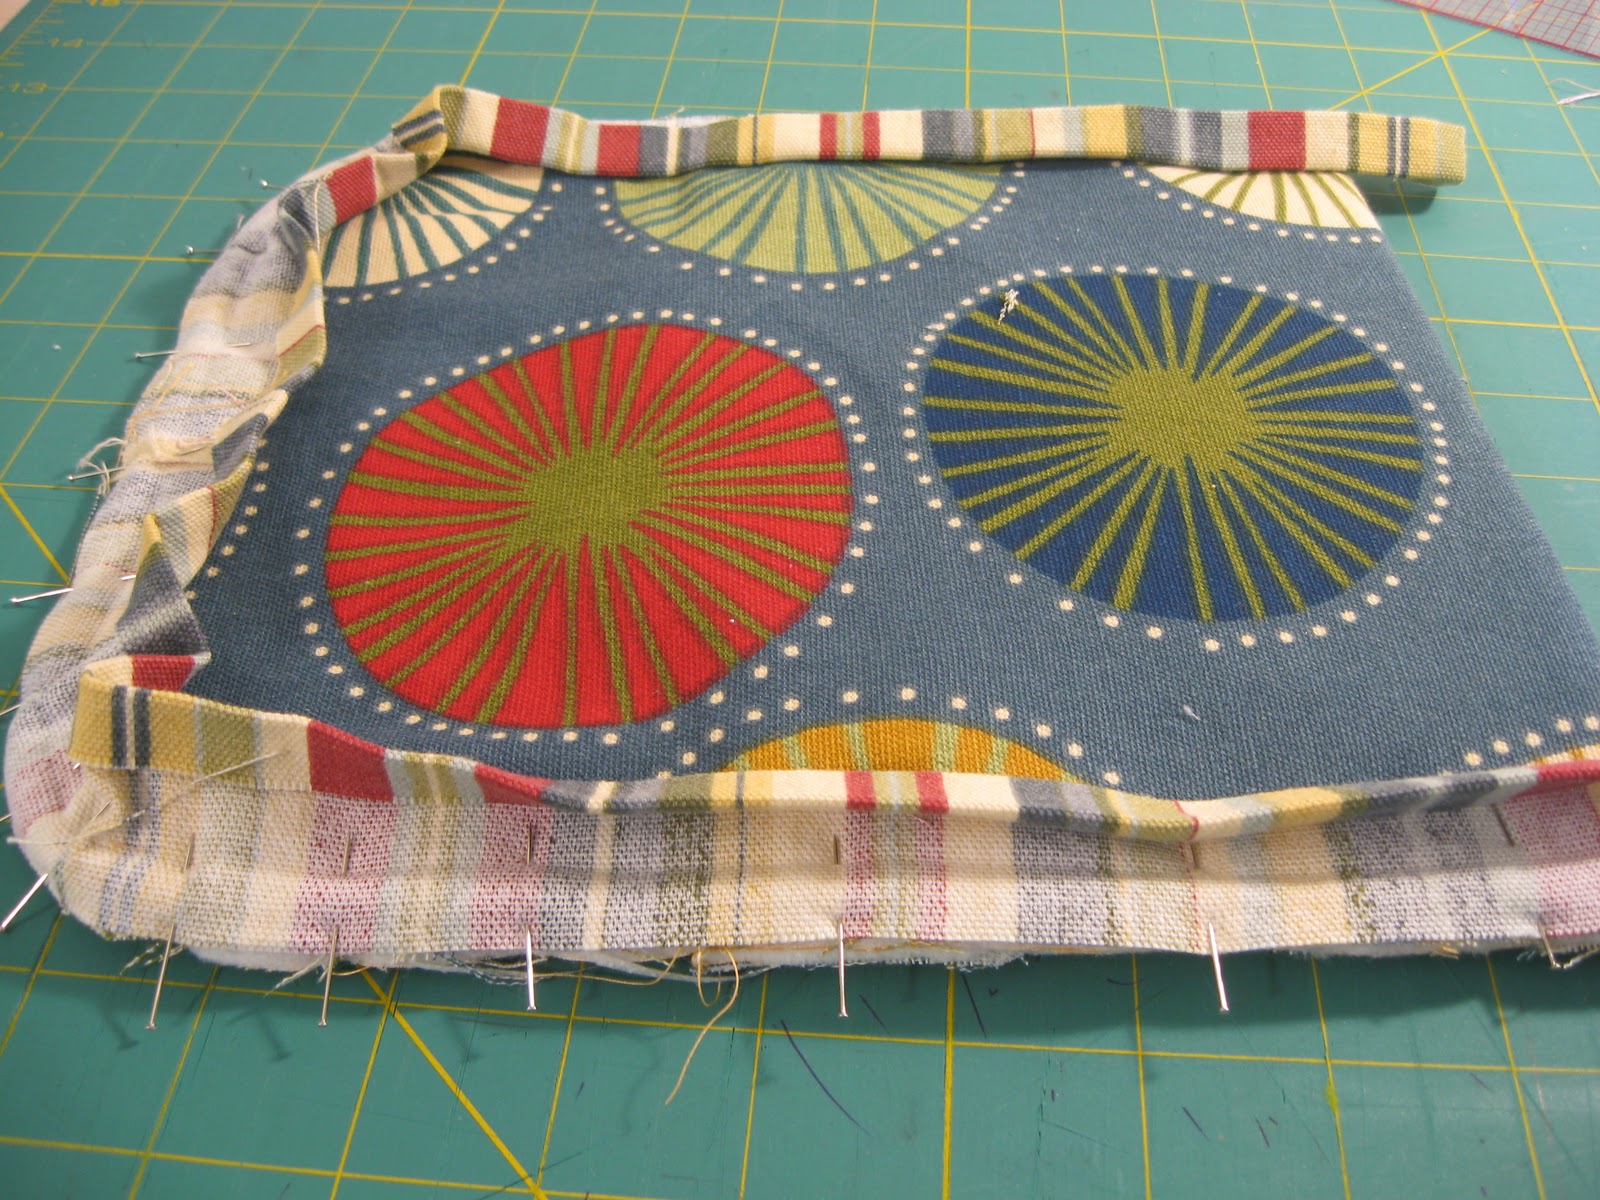
The drop-waist section should look something like the picture below. To help line up the side seams of the skirt with the drop waist, center the fabric of the drop-waist and iron the sides to create creases. You will use this when joining the drop-waist to the skirt.

Now for the skirt:
7.) With the RIGHT sides together, line up the raw edges and stitch seam. Trim the seams with pinking shears to keep the edges from raveling. Then press open.

8.) Create the gathers on the skirt. If you don't know how to make gathers, here is a great tutorial: Gathers.
9.) Pin skirt to raw edge of the drop-waist with RIGHT sides together. Match seams of skirt to creases you ironed into the drop-wasit section, adjusting gathers so they are even. Stitch pieces together.
10.) Zig-Zag stitch along the gathered seam to keep fabric edges from raveling.

11.) Press allowance seam up and topstitch close to the edge of the seam where the drop-waist meets the gathered skirt.


12.) Add elastic to the waistband. First, open the seam in the waistband and, then pull the elastic through using a safety pin.


14.) Hem the skirt you favorite way and you're done!!
Sew Simple!!!
Sunday, February 5, 2012
CAMERA WRISTLET
I couldn't sleep last night, so instead of "counting sheep", I tried out a new pattern!
Here's another pattern from Keyka Lou - this one for a camera case. It was so easy to do, I created it in about an hour.
My niece, Emily, told me that animal prints were the thing, so I decided to use this fabric since I had it and see how it turned out. It met with my daughter's approval, so I guess it turned out okay!
This is one of those cases that you could use for a camera or a cellphone and other little things. The velcro keeps the pouch contents secure, especially when closed with the strap.
The back of the case has a little pocket that would fit an ID or credit card.
 |
| Front view |
Here's another pattern from Keyka Lou - this one for a camera case. It was so easy to do, I created it in about an hour.
My niece, Emily, told me that animal prints were the thing, so I decided to use this fabric since I had it and see how it turned out. It met with my daughter's approval, so I guess it turned out okay!
This is one of those cases that you could use for a camera or a cellphone and other little things. The velcro keeps the pouch contents secure, especially when closed with the strap.
The back of the case has a little pocket that would fit an ID or credit card.
 |
| Back of case |
I will definitely make more of these.
Sew Sew Simple!!!
Saturday, February 4, 2012
LAPTOP COVER

Does this fabric look familiar? A previous blog showed a Kindle cover made from the same fabric. I measured a piece of fabric incorrectly, so decided not to waste it and made the Kindle cover even though I don't own a Kindle.

I found this laptop cover pattern on Keyka Lou. I acutally do own a laptop and this cover has worked out great. The pattern is for a 13" laptop, but there is a link to show you how to increase the size of the pattern for a larger laptop. (Thus, my mistake measuring.)
She has some really pretty patterns that are very easy to follow. The best part is that she encourages you to make her patterns and sell them at craft fairs or online! No copyright issues here.
I purchased several patterns and will be making them and posting pictures soon.
Happy Sewing!!
Friday, February 3, 2012
Fabric Giveaway!
Do you like getting free stuff? I do!! Anyway, I just found out about a fabric and ribbon bundle give-away contest. Check out this website: Craft Passion.
Since starting my adventure in the blogging world, I have been searching out sites for new ideas for sewing projects. It can be overwhelming sometimes. There is A LOT of good (and not so good) stuff out there.
This is one of my favorite places to visit. She has all sorts of good ideas and tutorials for sewing and crafts and recipes and lots more.
Who knows, maybe I'll get lucky!! ;-)
Wednesday, February 1, 2012
ZIPPERS!
If you're like me, and are always looking for cheaper places to purchase supplies then check out this website: Stan's Sewing Supplies.
He's got great prices on zippers and other sewing supplies.
A 7" nylon zipper at JoAnn's costs $2.99 (all nylon zippers at JoAnn's are $2.99), here it's only 50 cents. AND there is a large selection of colors.
I buy 18" zippers for 85 cents each and cut them down, depending on what I am making. Doing it this way just makes ordering easier for me.
You can even buy a 50 and 100-lot quantities of nylon zippers for a great discount.
I also like checking EBay, but Stan's in now my go-to place for zippers. It's easier shopping here than looking through all the "stores" on EBay if I just want zippers.
Friday, January 27, 2012
KINDLE/NOOK COVER

I made this Kindle/Nook cover because I mis-measured a piece of fabric and didn't want to waste it. I don't even own a Kindle or a Nook ... yet!
This is my first attempt at writing a "big" tutorial. It was a challenge to try to put in writing the stuff I usually do by instinct and experience.
The crazy thing about that is I have been a school teacher for the past 27 years and have taught language arts specifically for the past 12 years. We always have to write a "How-to" essay and it's one of the most difficult thing for kids to do. It's not easy for adults, either!
 |
| I had to borrow my sister-in-law's Kindle to take this photo. |
So here goes! I hope it you can understand my directions. AND I would really appreciate any constructive feedback you can provide.
Directions for a Kindle/Nook Cover:
Materials needed:
Main fabric - 16" x 9"Fabric for lining – 16” x "9"
Fusible interfacing - 16" x 9"
Fusible fleece - 16" x 9"
2" x 30" strip of complementary fabric for binding
Velcro - appox. 1" strip
Matching thread
All seams are 1/4"
Once you cut your fabric, round the edges of the corners of top side of the fabric. As you can see, I used a yogurt top. You can use any round shape that suits you.

Lay your main fabric on top of the lining and use it as a pattern to cut out the lining fabric.
  The rounded edge is the TOP of your piece, the straight edge is the BOTTOM. Iron the fusible fleece to the WRONG side of the lining. Leave a small margin around the edges, so the seams won't be too bulky when you sew the sides together.  Place the main fabric and lining with the RIGHT sides together and sew a seam along the BOTTOM straight edge. Fold back the seams, and with WRONG sides together, press the seam and top stitch along the BOTTOM straight edge.  Stitch around the all the raw edges to keep the front and back secure.  Measure 6 inches from the bottom and fold the edge up to create the envelope/pocket for the e-reader. Stitch along the side edges to close the pocket. |

Time to make the binding:
Take the 2” x 30” fabric strip and fold it in half and press with iron.

Open it up and press edge to crease in the middle.
Repeat for other side.

Fold the binding over the raw edges.
I like to use Steam-a-Seam to hold everything down before I sew. Or you can just pin it.

Stitch the binding closed around the edges.


You’re finished!

Friday, January 13, 2012
Diaper Bag using a pattern

I finished this diaper bag for my step-daughter a few weeks ago, but really couldn't show it off until I gave it to her at her shower.

I used Butterick Pattern B5005, but made a few changes. I haven't used a store-bought pattern in years and now I know why. They are a pain in the butt. I discovered that I have little patience for the extra steps of cutting out the pattern pieces, then laying them out, and then cutting the fabric. But, patterns are necessary. I like to follow a pattern the first time I try one, but after that I make changes.
This pattern was easy enough to put together. I will definitely make this bag again, but with changes. And, I probably won't use the pattern.

I changed the side pockets by adding elastic gathering. I didn't like the idea of more ribbons to tie or the open pockets like the pattern choices. You might be able to see the side pockets in the pattern picture above.

I also added outside pockets to both front and back sides of the bag. The pattern only called for pockets on one side.


I made a little "binky" bag, a changing pad, 3 burp rags, and a wipes cover to go with the set.

Subscribe to:
Posts (Atom)